
OOOOH! Look at this pretty card! So much texture, interest, and technique in one card! I know you all tease me…..I say it’s easy and you don’t believe me…..but lets break this down in to a few steps….you can do this!
Next….copy and try different embossing folders, Designer Series Paper and colors :). Have FUN!

Note, this is called a double embossing technique card….it uses both dry embossing and heated embossing.
Begin by putting a piece of Adhesive Sheet on a piece of 4 1/4” x 5 1/2” piece of card stock like this. It does not matter what color of card stock you use….it will only be seen on the back side and you’ll layer it on to a matte and card base

Next decide on what pattern paper (DSP) you want to use and cut in 1” strips and place them on to the adhesive sheet. You can place them in any design you would like to. Here, Sale-a-bration DSP, Softly Stippled was used. It is one of the patterned paper earned FREE with a $50 purchase.


Trim off the ends of the Designer Series Paper that go past the 4 1/4” x 5 1/2” piece of card stock
Next Choose your embossing folder. Here I choose a NEW embossing folder from the January to April mini catalog called Layered Florals 3D embossing folder #162935 $11.
Ink the embossing folder on the side on the Stampin’ Up logo…which happens to be the raised background (the negative image part). I used Pebbled Path ink. It is the darker ink listed for the DSP. Place the DSP strip card stock you made inside with the top of the DSP facing the inked embossing folder. Close embossing folder and run through die cutting machine. Since this is a 3D embossing folder, use the base plate (#1) and gray plate (#4)

Next, using a Q tip and Tombo liquid and spread just a little Tombo on the embossed piece of CS. You don't need much!!!! Place Guilded Gilded Leafing #154560 $9 And if you desire more….then go back and add more Tombo and Guilded Leafing. Use a sponge to wipe off excess. I put mine in a medium size plastic container with a lip to keep if from flying away.
Our next step is the heated embossing. Very easy….totally ink the embossed CS by using your VersaMark and inking directly on the embossed CS and then pour CLEAR embossing powder all over and Heat. This also seals the gold leafing on your card.
This make a total shine on your project and brightens the colors of your project. You may want to do this twice depending your desired look
At this point you can cut the piece to 4” x 5 1/4” and mount on to a matte 4 1/8” x 5 3/8” or directly onto a card base cut 8 1/2” x 5 1/5” scored and folded in the middle (4 1/4")
I finished my card by cutting a small tag and using Sale-a-bration, FREE stamp set Softly Sophisticated for the sentiment and flowers stamped on the small tag. After stamping, I used VersaMark all over the tag and then embossed with clear embossing powder and heat.
And finally found the perfect little leaves from Notes of Nature Dies and die cut one out of Lost Lagoon card stock. Before using Clear Embossing Powder, I used a little Tombo on a Q Tip and applied Guilded Leafing. Using the Clear Embossing powder helped seal the Guilded leafing and made the Lost Lagoon a rich color to complete my card.
I hope you will have fun playing with different DSP, embossing folder and color combinations!!! You’ll have to text me pictures and I’ll post next week along with swap cards from out most recent team meeting.
sale-a-bration perks- glass mat studio
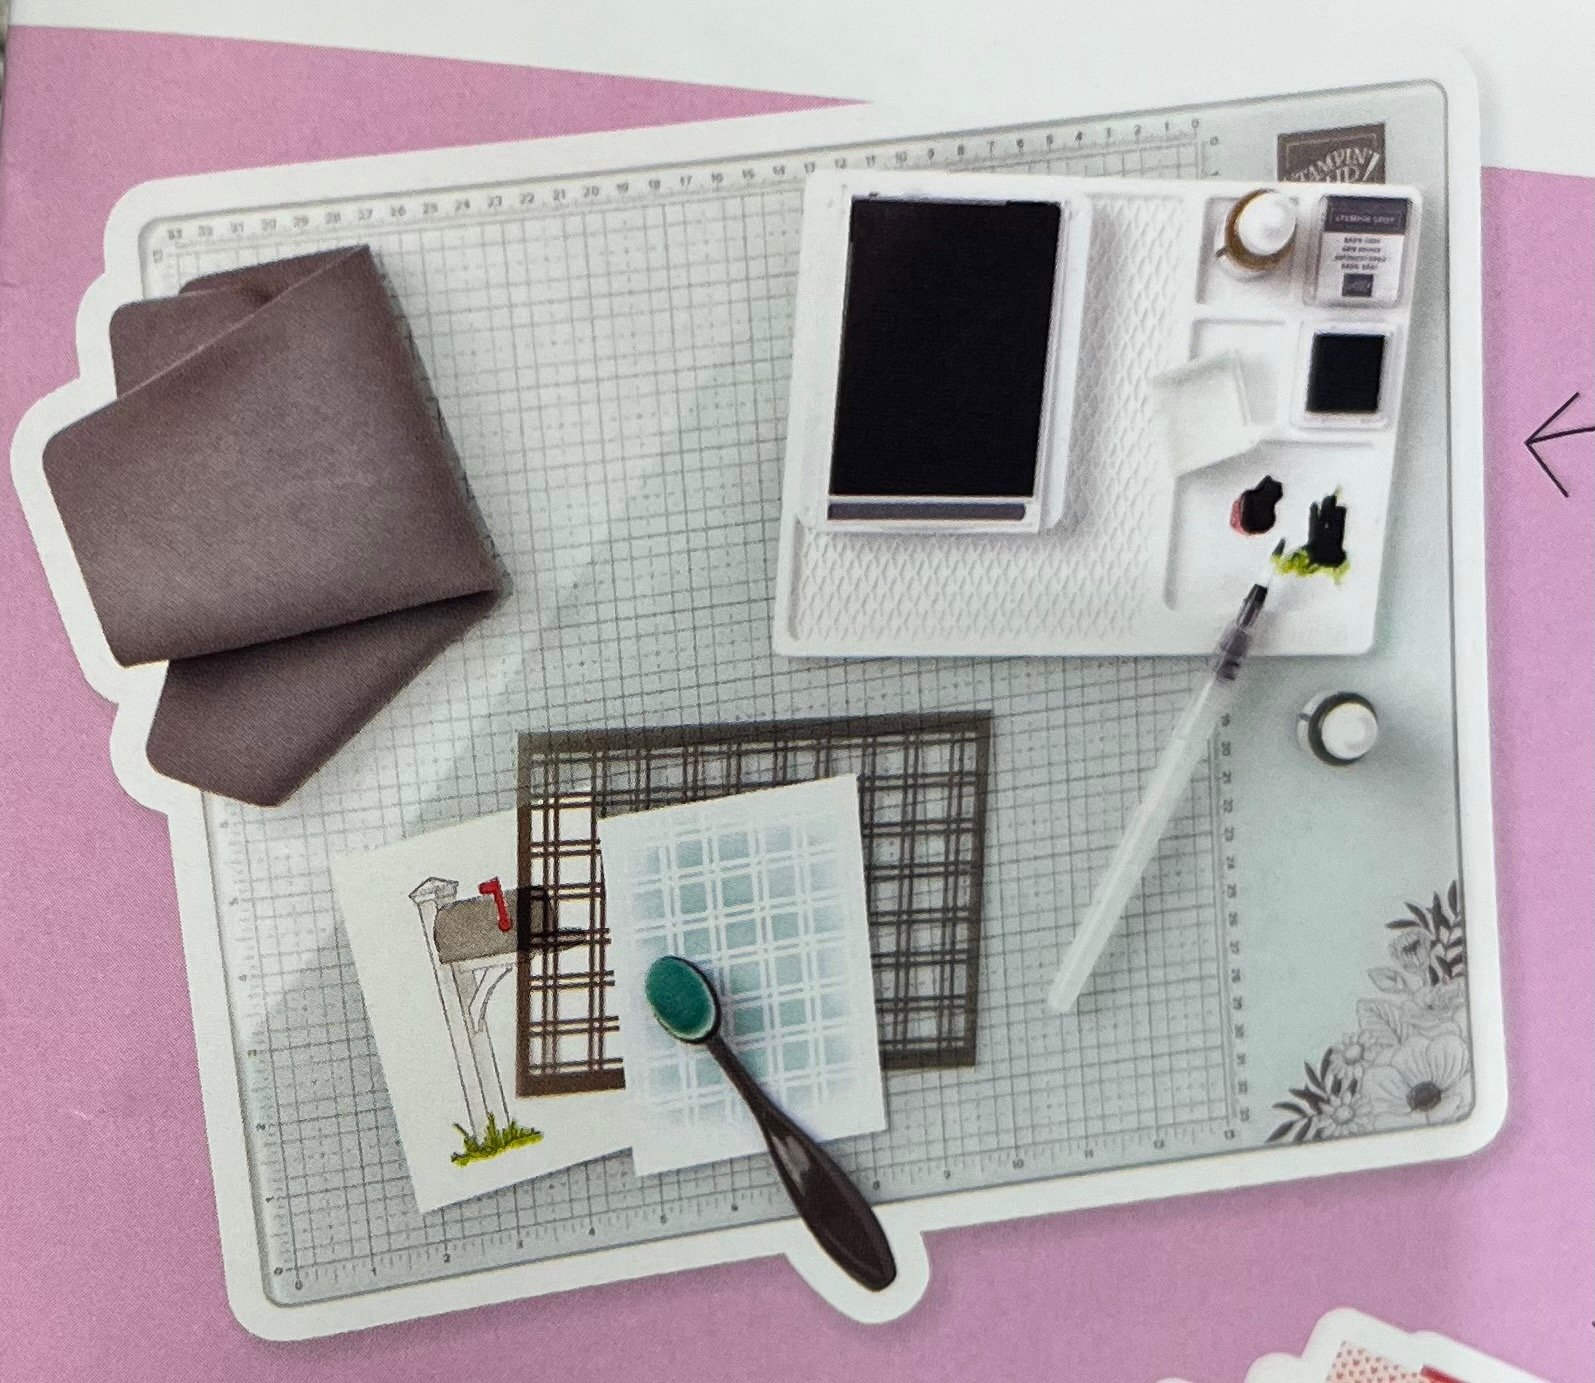
I can’t emphasize how NICE it has been to use the Glass Mat Studio to stamp with!!!….all of the little flowers I stamped on the tags (and I stamped over 30 of them!) where stamped on the Glass Mat Studio. I was SO impressed that all of them turned out great! They were a solid photopolymer stamp. Normally, I would have to use a Stampin’ Pierce Mat to get a good image…..BUT I got a great stamped image just on the Glass Mat and then I used it again to heat all my small embossed die cut leaves and tags…RIGHT ON THE MAT, just holding them in place with a Take Your Pick Tool to keep them from blowing off with out melting the table!!! I loved it!!!
So….bottom line….I would encourage you if you have ever thought about joining the Stampin’ Up family of demonstrators…this is an AWESOME TIME BECAUSE THE GLASS MAT STUDIO IS FREE WHEN YOU JOIN :)
Of course there are other benefits too….
discounts on your orders under your demonstrator number
order early as a demonstrator
attending my team meetings that usually happen every other month free with gifts and make & take cards, more techniques and community with other demonstrators. (Yesterday, 23 demos met for team meeting at my house)
sale-a-bration perks for everyone!
Join me for Stampin’ Blitz
This February 17th for a Birthday Stampin’ Blitz from 8 AM to 8 PM make 20 Birthday cards…2 of 10 designs. The following bundles will be used. Cost is $110 plus a bundle through me.
Reserve your spot by completing the confirmation form below and writing your choice of bundle on your sheet and send to me with $50 deposit.
Cake Fancy Stamp set and Hills of Tuscany Stamp set $44
Flower Cart Bundle $52
Hot Air Ballon Bundle $45
Ice Cream Swirl Bundle $53
Notes of Nature Bundle $46
Kidding Around Bundle $54
Cutest Cow Bundle $41
Sending Love Bundle $54
Hooray for Surprises Bundle $46